How to Test for Lead Paint in Your Home
Testing for Lead Paint
The only way to be certain that your home is safe (or unsafe) is to test for lead paint. You can test for lead using specialized kits. The process is not complicated, requiring only a kit and utility knife. But it is essential to use proper protection while testing to avoid exposure to lead paint dust or flakes.
Safety Precautions
There are a limited number of methods for how to detect lead paint in a home, but when using any lead paint test kit, prioritize safety by wearing proper personal protective equipment (PPE), including an N100 respirator, gloves, goggles, and disposable coveralls. “Any time lead-based paint has been identified and renovation or remodeling is planned, the work should be done using lead-safe work practices,” says M.L. Tanner, Regional Vice President for Region 7 on the National Environmental Health Association Board of Directors.
Seal off the work area with 6-mil plastic sheeting, ensuring that you cover the floors and furniture, then seal the seams with duct tape. Use a utility knife to expose the layers of paint, then test the painted surface with a lead test kit. After testing, use a HEPA-filtered vacuum to clean the area. Do not eat, drink, smoke, or apply cosmetics in the work area, and make sure to wash hands thoroughly after handling the test kits.
Step 1: Purchase a lead paint test kit.
You’ll find that most lead paint test kits offer several lead testing swabs or enough liquid solution for multiple tests at a cost of $50 or less, which is considerably cheaper than hiring someone to test for lead paint on your behalf. You can find DIY lead test kits like Lead Check at Lowe’s, The Home Depot, and other home improvement stores, but Tanner notes that “there are currently only two test kits recognized by the Environmental Protection Agency.” He suggests checking the EPA website for updated and detailed information about the test kits and how to use them.
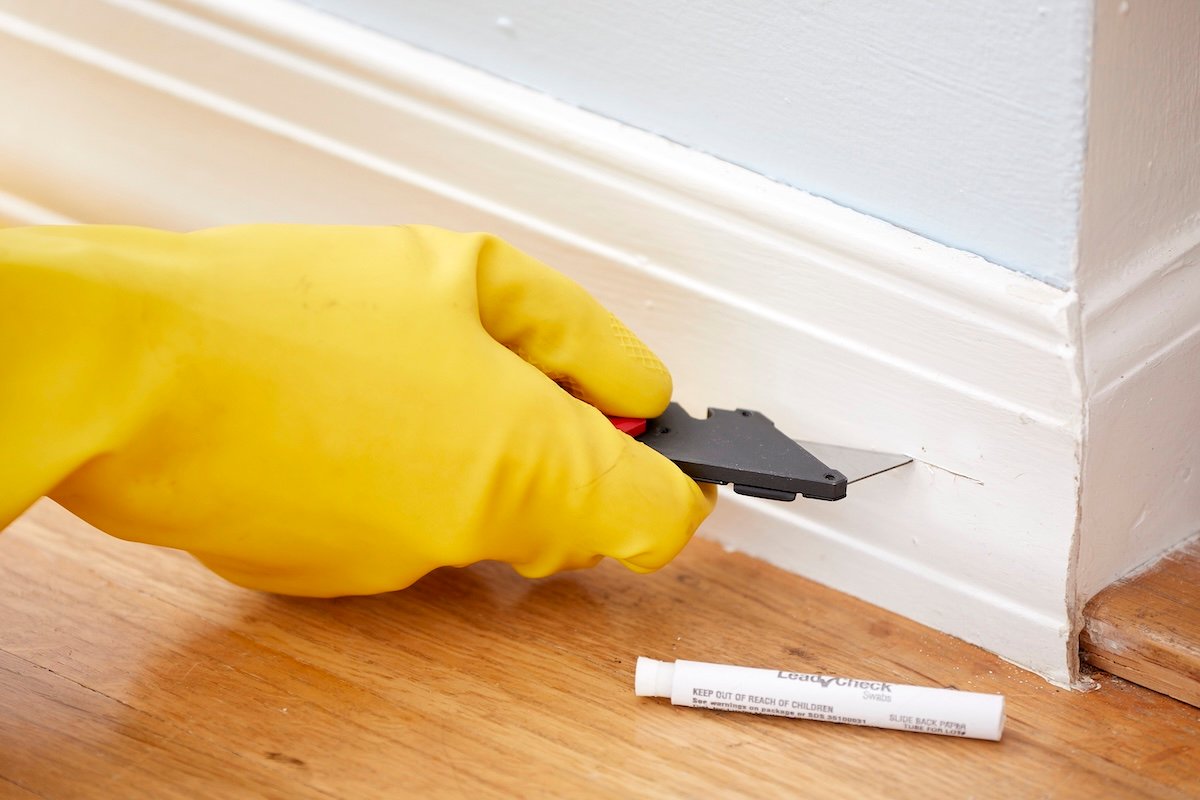
Step 2: Expose the paint with a utility knife.

Before swabbing the area, you must expose the underlying layers of paint. Choose spots on the painted surface where the finish seems to be thickest, then use a utility blade, putty knife, or a small, sharp knife to make a ¼-inch incision, slicing through the surface paint and revealing all the previous layers beneath it.
Step 3: Swab the exposed surface.

You must handle swabs with precision to ensure accurate results. “Follow the directions carefully. Since there will be a color change involved if lead is present, test in an area with good lighting,” suggests Tanner. In addition:
- Pinch or crush the swab in the two designated areas (usually marked A and B) to mix the solid and liquid chemicals inside.
- Shake the swab and squeeze the tip until the liquid turns yellow or orange.
- Rub the tip of the swab inside the notch you cut for about 30 seconds.
- Apply pressure in a circular motion to make sure the swab has ample contact with each layer of exposed paint.
Step 4: Read the results.

Test swabs will generally turn pink or red within about 30 seconds if lead is present, but it’s important to read the directions clearly to ensure you understand the results for a particular kit. If there is no color change, you’re likely in the clear, but these kits include multiple swabs so you can repeat the test to be safe. It’s also a good idea to use these extra swabs to test multiple spots on the painted surface to be sure of the results. Additionally, most test kits come with a confirmation card, which you can use to make sure the chemicals on your swab are reacting properly.
What to Do If Your Home Tests Positive for Lead
After using a lead test and finding signs of lead based paint, you will need to decide how to deal with the situation and whether to remove the lead paint. According to Tanner, “the most effective type of test for lead in paint is laboratory analysis of a paint chip sample.” A lab analysis will take about 5 to 10 business days to send the results. Review the written report provided to you by the lab, and if your home tests positive for lead, use the EPA’s locator to find a certified inspector or risk assessor to conduct a thorough assessment of your home. The assessor will then provide a recommendation for abatement or a long-term maintenance plan.
If the Inspector Recommends Abatement
Find a lead paint abatement specialist through the EPA’s locator or get a recommendation from your assessor. The abatement specialist will notify the EPA at least 5 days before beginning the abatement process, which typically involves replacing building components that have lead-based paint, enclosure of the lead-based surfaces, or encapsulation using specialized sealants to lock the lead in place. You and your family might also need to have blood tests to determine the level of exposure and whether any medical response is in order.
If the Inspector Recommends a Maintenance/Exposure Prevention Plan
The assessor might decide that the issue is minor enough for handling with an exposure prevention plan instead of abatement. Professionals will provide a long-term maintenance plan with a set of detailed instructions. You will need to complete regular inspections and if you undertake home renovations, you will need to hire lead-safe certified home contractors to perform the work in a way that’s safe for all involved.
FAQ
Lead-based paint still remains toxic even when it has been painted over, since the lead remains present beneath the new layers, so you will need to consider more than just the cost to paint your house if a lab analysis detects lead. Encapsulation with specific sealants or coatings can safely manage intact lead paint, but if the underlying paint peels, creates dust, or is otherwise damaged, it can pose a hazard.
Vinegar is not a suitable method to test for lead paint. While some at-home test kits indicate using white vinegar during the testing process, this is merely to activate the chemical reagent in the testing swabs. The vinegar does not detect lead on its own, so you should stick to using an EPA-recognized lead paint test kit or hiring a certified professional for accurate results.
The exact cost to remove lead paint varies depending on the size of the affected area, the removal method used, the location of the paint, and any prep work that might be required, but on average, you will typically pay between $1,445 to $5,412 to remove lead paint.

Meet the 2025 Tools of the Year